Creating Open Graph Images Automatically for Each Blog Post
Part of the series Create a Blog with VitePress and Vue.js from Scratch
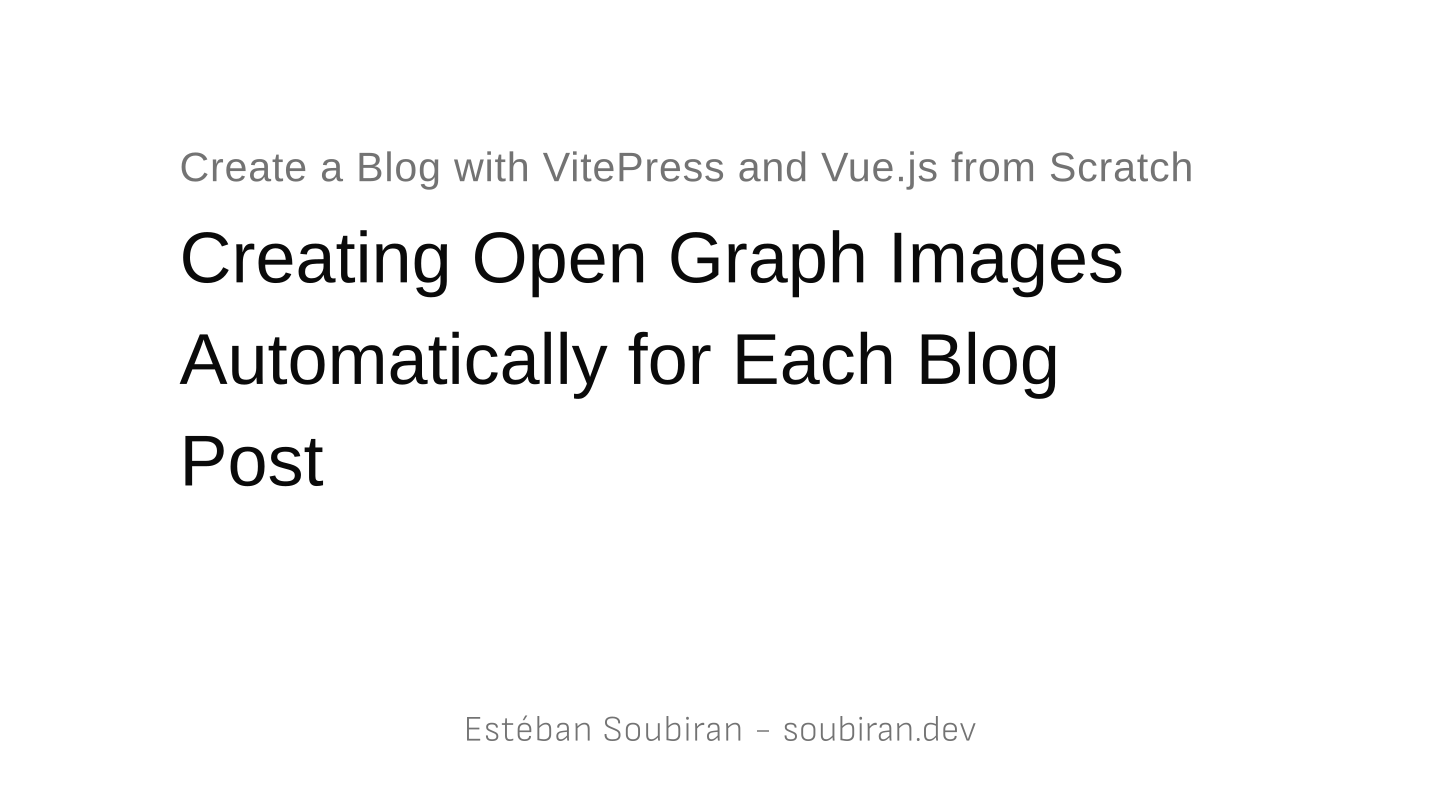
Sharing content on social media is one of the most effective strategies to engage with a wider audience. When promoting a blog post, including an Open Graph image (OG image) is crucial for improving the post's visual appeal. These images are displayed when sharing links on platforms such as Twitter, Facebook, and LinkedIn.
Note
An OG image is a PNG or JPEG that should be at least 1200 x 630 pixels in size, less than 5MB, and referenced in the <meta property="og:image" content="..."> tag within the HTML <head> section using an absolute URL.
Creating an OG image for each blog post manually can be time-consuming. Moreover, any design modifications necessitate updating all the OG images, which is impractical in the long run. It's essential to be agile in updating and evolving our blog efficiently without dedicating excessive time. Keep in mind our goal: Writing is the primary focus, the rest is automated.
The Theory
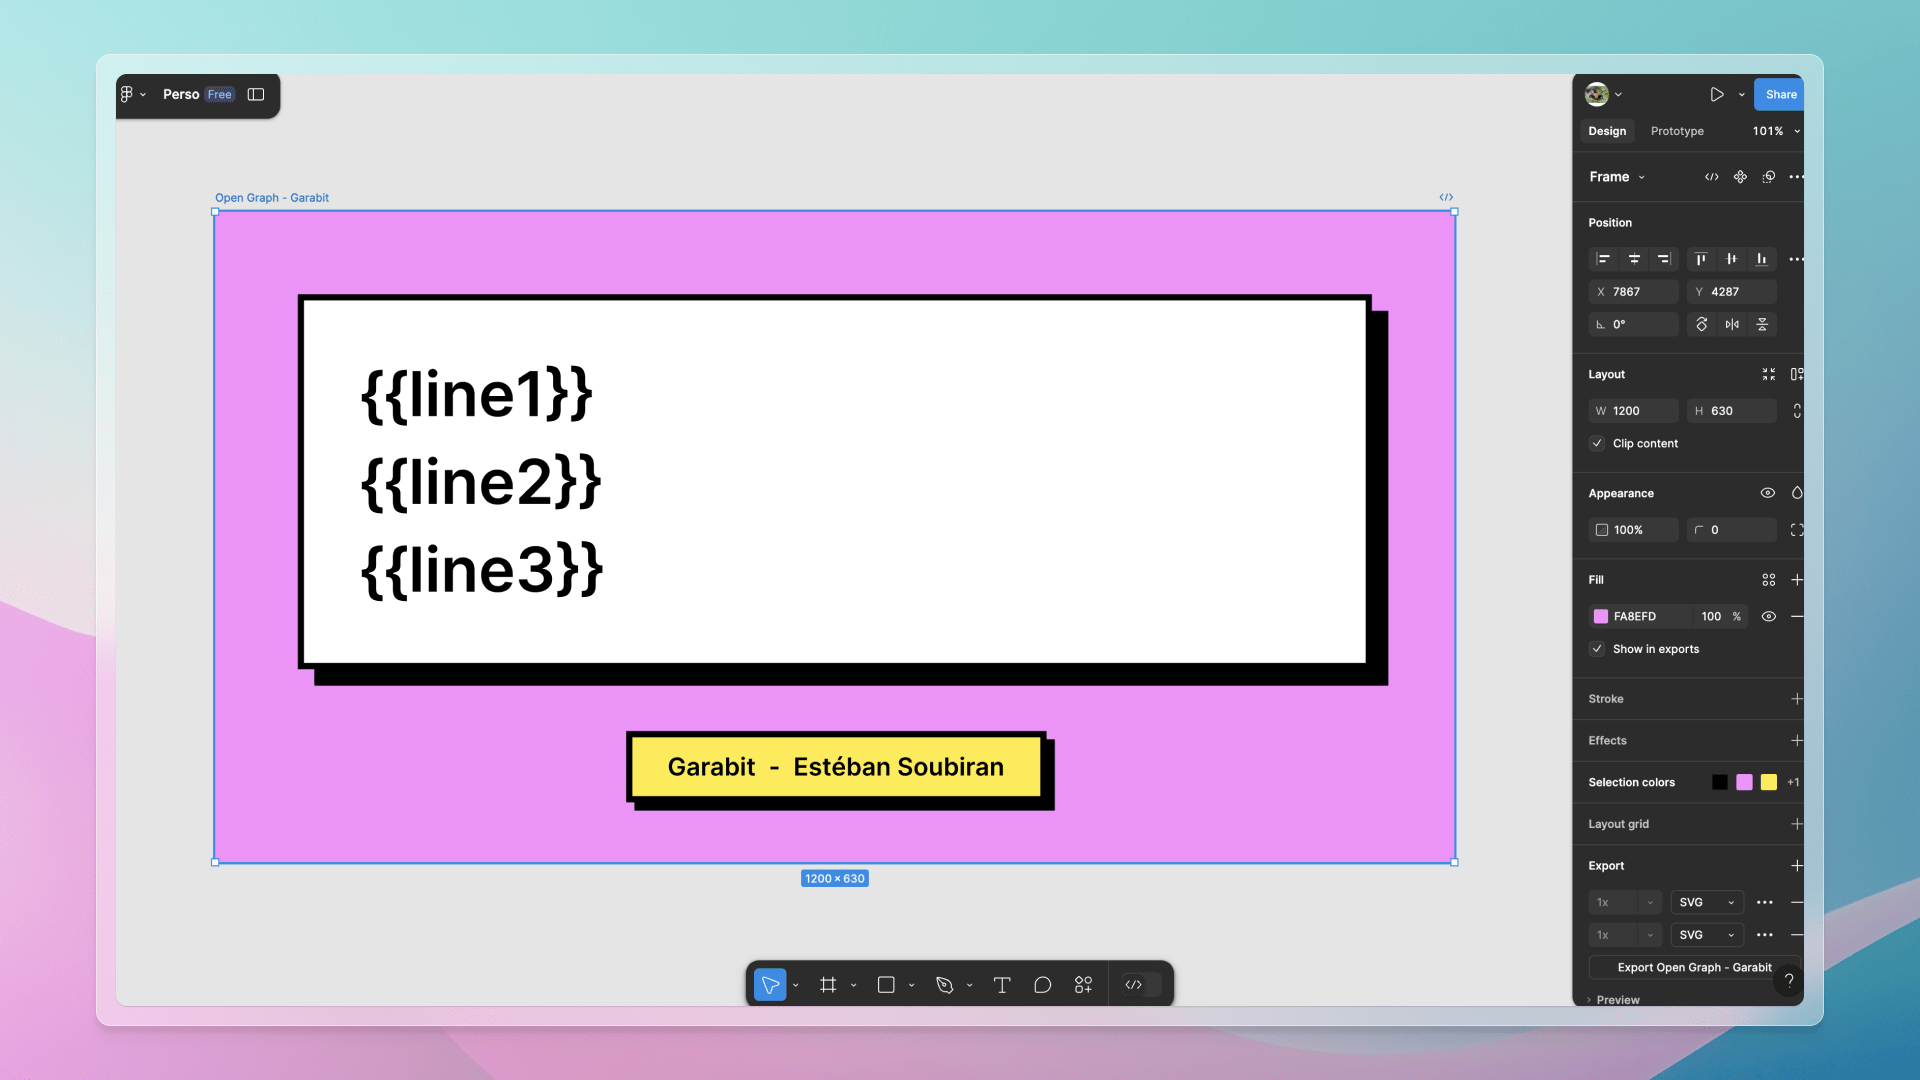
To dynamically generate an OG image, we first need to create an SVG template. In this template, placeholders will represent content like the page title, description, and author. Using a suitable library, we will convert this SVG template into a PNG image for each page, utilizing the designated placeholders.
These generated images will be added to the .gitignore file, ensuring that each time we generate the website, the OG images are also created. During development, we check if an OG image already exists to avoid unnecessary computation.
Note
This approach was inspired by Anthony Fu's blog. I have adapted it to suit our requirements.
The steps for generating the OG images are as follows:
- Create an SVG template with Figma (or another tool of choice).
- Export two versions: one with outlined text and one without.
- Manually integrate the two SVG templates, preserving the outlined text while keeping the placeholders and
<text>tags from the original. - Implement a function in VitePress to dynamically create the OG image.
The Implementation
Enough theory; let's delve into the implementation.
Create the SVG Template
In Figma, design an OG image template with dimensions of 1200 x 630 pixels. Define placeholders for the post title using , , and , each accommodating up to 30 characters, allowing a total of 90 characters for most titles. Remember, SEO practices discourage titles exceeding 100 characters.

Tip
If you're uncertain about getting started, consider using the template I created for this project and upload it to Figma.
Export two SVG files: one with outlined text and another without (ensure the option is unchecked). Both exports should be SVG files.
Merge the Two SVG Templates
Upon exporting, we have two SVG files which need to be merged to develop our template.
Warning
This is the most challenging part. Continue reading before starting to merge the SVG files.
The smaller SVG contains readable text, which exists within <text> tags. Retain these <text> tags representing our placeholders:
<text fill="black" xml:space="preserve" style="white-space: pre" font-family="Inter" font-size="60" font-weight="600" letter-spacing="0em"><tspan x="140" y="198.318">{{line1}}</tspan></text>
<text fill="black" xml:space="preserve" style="white-space: pre" font-family="Inter" font-size="60" font-weight="600" letter-spacing="0em"><tspan x="140" y="283.318">{{line2}}</tspan></text>
<text fill="black" xml:space="preserve" style="white-space: pre" font-family="Inter" font-size="60" font-weight="600" letter-spacing="0em"><tspan x="140" y="368.318">{{line3}}</tspan></text>
Open both SVG files side by side to simplify the merging process. Find the equivalent <pathx> tags in the larger file, which represent the outlined or vectorized text.
For example, the text transforms into the path:
<pathx d="M141.982 180.358V176.629C144.396 176.629 146.08 176.139 172.602V179.761H357.958V172.602H364.712Z" fill="black"/>Note
The path example is shortened for clarity. Actual paths are considerably longer.
Keep the files open concurrently as text order corresponds in both. Replace <path> tags in the second file with the <text> tags from the first file. Retain any <path> tags not associated with text placeholders.
Tip
Assign a color to the placeholders in Figma to easily identify them during merging. You can update the color in the SVG file via the fill property.
After combining, optimize the resultant SVG file using SVGO.
This refined SVG template is now ready for use in our VitePress project. Save it to the .vitepress directory as og-template.svg.
Tip
Access the final SVG template in the project repository.
<!-- Partial SVG, DO NOT USE AS IS -->
<svg xmlns="http://www.w3.org/2000/svg" fill="none" viewBox="0 0 1200 630">
  <!-- Template elements -->
  <path fill="#FA8EFD" d="M0 0h1200v630H0z"/>
  <path fill="#000" d="M96 96h1040v363H96zm310 415h407v69H406z"/>
  <path fill="#FEEA35" d="M401 506h401v63H401z"/>
  <path stroke="#000" stroke-width="6" d="M401 506h401v63H401z"/>
  <path fill="#000" d="M451.415 534.119a4.504 4.504 0 0 0-.588-1.235 3.79 3.79 0 0 0-.887-.946 3.571 3.571 0 0 0-1.176-.589 4.917 4.917 0 0 0-1.449-.204c-.937 0-1.772.236-2.505.707-.733.472-1.31 1.165-1.73 2.08-.415.909-.623 2.017-.623 1.679c.375.733.56 1.622.554 2.668V546h-3.085v-7.858c0-.875-.227-1.56-.682-2.054-.449-.494-1.071-.741-1.866-.741-.54 0-1.02.119-1.441.358a2.477 2.477 0 0 0-.98 1.014c-.233.443-.349.98-.349 1.611Z"/>
  <path fill="#fff" d="M83 83h1034v357H83z"/>
  <path stroke="#000" stroke-width="6" d="M83 83h1034v357H83z"/>
  <!-- Text placeholders -->
  <text xml:space="preserve" fill="#000" font-family="Inter" font-size="60" font-weight="600" letter-spacing="0em" style="white-space:pre"><tspan x="140" y="198.318">{{line1}}</tspan></text>
  <text xml:space="preserve" fill="#000" font-family="Inter" font-size="60" font-weight="600" letter-spacing="0em" style="white-space:pre"><tspan x="140" y="283.318">{{line2}}</tspan></text>
  <text xml:space="preserve" fill="#000" font-family="Inter" font-size="60" font-weight="600" letter-spacing="0em" style="white-space:pre"><tspan x="140" y="368.318">{{line3}}</tspan></text>
</svg>
Generate OG Image Dynamically
To maintain organization, add a file named genOg.ts in the .vitepress directory. This script contains functions necessary to split the title into three lines and generate the OG image.
First, install the necessary dependencies:
pnpm add -D sharpSubsequently, create the function for the OG image generation.
Steps to accomplish this include:
- Load the SVG template.
import { readFileSync } from 'node:fs'
import { join } from 'node:path'

const ogSvg = readFileSync(join('.vitepress', 'og-template.svg'), 'utf-8')- Check for pre-existing OG image; generate if absent:
import { existsSync } from 'node:fs'

if (existsSync(output)) {
  // eslint-disable-next-line no-useless-return
  return
}- Create the directory for OG images if it does not exist:
import { mkdirSync } from 'node:fs'
import { dirname } from 'node:path'

mkdirSync(dirname(output), { recursive: true })- Break the title into three lines:
const lines = title
  .trim()
  .split(/(.{0,30})(?:\s|$)/g)
  .filter(Boolean)

const data: Record<string, string> = {
  line1: lines[0],
  line2: lines[1],
  line3: lines[2],
}- Substitute placeholders in the SVG template with title lines:
const svg = ogSvg.replace(/\{\{([^}]+)\}\}/g, (_, name) => data[name] || '')- Transform the SVG template into a PNG image and store it:
import { Buffer } from 'node:buffer'
import sharp from 'sharp'

await sharp(Buffer.from(svg)).resize(1440, 810).png().toFile(output)
Here is the comprehensive function:
import { Buffer } from 'node:buffer'
import { existsSync, mkdirSync, readFileSync } from 'node:fs'
import { dirname, join } from 'node:path'
import sharp from 'sharp'

const ogSvg: string = readFileSync(
  join('.vitepress', 'og-template.svg'),
  'utf-8',
)

/**
 * @credit Anthony Fu, https://antfu.me
 * @link https://github.com/antfu/antfu.me/blob/main/vite.config.ts#L242
 */
export async function genOg(title: string, output: string) {
  // Skip if the file already exists
  if (existsSync(output))
    return

  // Ensure the output directory exists
  mkdirSync(dirname(output), { recursive: true })

  // Break the title into lines of 30 characters
  const lines = title
    .trim()
    .split(/(.{0,30})(?:\s|$)/g)
    .filter(Boolean)

  const data: Record<string, string> = {
    line1: lines[0],
    line2: lines[1],
    line3: lines[2],
  }
  const svg = ogSvg.replace(/\{\{([^}]+)\}\}/g, (_, name) => data[name] || '')

  console.info(`Generating ${output}`)
  try {
    await sharp(Buffer.from(svg)).resize(1440, 810).png().toFile(output)
  }
  catch (e) {
    console.error('Failed to generate og image', e)
  }
}
Assign OG Images to Each Post
Now that we have a functional method to generate OG images utilizing a title, it is crucial to determine when and where this function should be invoked.
The easiest strategy is to operate this function every time a file is processed by VitePress within the transformPageData, subsequent to the adjustments from the previous article.
Initially, extract the name for the OG image using the slugged file path:
import { defineConfig } from 'vitepress'

export default defineConfig({
  async transformPageData(pageData) {
    // ...

    const ogName = pageData.filePath
      .replaceAll(/\//g, '-')
      .replace(/\.md$/, '.png')
  }
})
Here, a file path such as blog/learn-vitepress.md transforms into blog-learn-vitepress.png. This transformation is safe because Markdown filenames are already URL-compatible and adhere to filesystem norms.
Next, invoke the function:
import { joinURL } from 'ufo'
import { defineConfig } from 'vitepress'
import { genOg } from './genOg'

export default defineConfig({
  async transformPageData(pageData, { siteConfig }) { // Be careful, `{ siteConfig }` is a new parameter
    // ...

    await genOg(
      pageData.frontmatter.title || pageData.title || siteConfig.site.title,
      joinURL(siteConfig.srcDir, 'public', 'og', ogName),
    )
  }
})
To ensure a fallback approach, we check for these potential titles: the frontmatter title, the inferred page title from the first h1, or, if neither are present, use the site title. This prevents the output of a blank OG image. Store generated OG images in the public directory under og to avoid name conflicts, as this folder merges into the dist.
Include og in the .gitignore file since it only contains generated outputs.
Incorporate Metadata
Lastly, append metadata to inform social networks about the OG image's location, leveraging the previous SEO article advancements.
import { joinURL } from 'ufo'
import { defineConfig } from 'vitepress'

export default defineConfig({
  async transformPageData(pageData, { siteConfig }) {
    // ...

    // Integrate OG image URL into frontmatter
    pageData.frontmatter.head.push(
      [
        'meta',
        {
          property: 'og:image',
          content: joinURL(
            'https://garabit.barbapapazes.dev', // Please, change this before deploying
            'og',
            ogName,
          ),
        },
      ],
      [
        'meta',
        {
          name: 'twitter:image',
          content: joinURL(
            'https://garabit.barbapapazes.dev', // Please, change this before deploying
            'og',
            ogName,
          ),
        },
      ],
    )
  }
})
An OG Image for Every Path
This guide was anticipated eagerly as OG images are both pivotal and laborious to produce. The mechanisms here, which I have employed for several months, ensure the swift regeneration of OG images upon template changes. Over time, I have continuously tailored the template to align with evolving needs. Expanding on this methodology, I recently incorporated a headline for series titles following similar techniques.
I can only recommend this simple approach, as it has significantly improved my workflow. I hope it will do the same for you.

Thanks for reading! My name is Estéban, and I love to write about web development and the human journey around it.
I've been coding for several years now, and I'm still learning new things every day. I enjoy sharing my knowledge with others, as I would have appreciated having access to such clear and complete resources when I first started learning programming.
If you have any questions or want to chat, feel free to comment below or reach out to me on Bluesky, X, and LinkedIn.
I hope you enjoyed this article and learned something new. Please consider sharing it with your friends or on social media, and feel free to leave a comment or a reaction below, it would mean a lot to me! If you'd like to support my work, you can sponsor me on GitHub!
Discussions
Add a Comment
You need to be logged in to access this feature.