Create Real-Time Node.js Apps with Server-Sent Events
I'm deeply convinced that to understand a concept or a technology, we all need to try to cook something with it using the lowest level possible. This is not only related to programming but to everything in life.
In the continuation of the article Real-time without WebSocket, I think that building a little client-server application using Server-Sent Events (SSE) is a good way to understand how it works and to give us the confidence to use it in our projects.
This client-server application will be a little chat where the client will send a message to the server and the server will broadcast the message to all connected clients. No external library, no framework, just Node.js.
Requirements
To follow this tutorial, we need to have Node.js installed on our machine. That's all.
The Server
Create a file named server.mjs. This file will contain the server code to perform the following actions:
- Serve the client-side code aka a simple HTML file
- Receive messages from clients
- Accept Server-Sent Events connections and broadcast messages
But for now, let's begin by serving the client-side code. Our server will be built using the native Node.js http module.
import { readFileSync } from 'node:fs'
import { createServer } from 'node:http'
import { join } from 'node:path'

const hostname = '127.0.0.1'
const port = 3000

const server = createServer((req, res) => {
  // Serve the index.html file
  res.statusCode = 200
  res.setHeader('Content-Type', 'text/html')

  const htmlFile = join(process.cwd(), 'index.html')
  const html = readFileSync(htmlFile, 'utf-8')

  res.write(html)
  res.end()
})

server.listen(port, hostname, () => {
  console.log(`Server running at http://${hostname}:${port}/`)
})
When a request hits the server, it will respond with the content of the index.html file by reading it on the disk. The server is listening on the port 3000.
We can start our server with the following command:
node server.mjsThe Client
Create a file named index.html at the root of the project. This file will contain the client-side code:
<!doctype html>
<html lang="en">
  <head>
    <meta charset="UTF-8" />
    <meta name="viewport" content="width=device-width, initial-scale=1.0" />
    <title>Node SSE</title>
  </head>
  <body>
  </body>
</html>
Yeah, that's a very simple HTML file, nothing fancy for now.
Server-Sent Events Connection
Now, let's add the Server-Sent Events connection to the server. To handle SSE, we need to respond with some headers to keep the connection open and to send data. So the client will ask for a resource and the server will respond with a stream.
This resource will be /events. Let's update the server code:
// ...

const server = createServer((req, res) => {
  // `/events` endpoint used to listen for messages
  if (req.url === '/events') {
    res.setHeader('Content-Type', 'text/event-stream')
    res.setHeader('Cache-Control', 'no-cache')

    // TODO: Handle the connection
  }
  else {
    // Serve the index.html file
    res.statusCode = 200
    res.setHeader('Content-Type', 'text/html')

    const htmlFile = join(process.cwd(), 'index.html')
    const html = readFileSync(htmlFile, 'utf-8')

    res.write(html)
    res.end()
  }
})

// ...
When the client asks for the resource /events, the server will respond with the headers Content-Type: text/event-stream, and Cache-Control: no-cache. This will tell the client that the connection is a stream, i.e. the server will send data to the client at any time. The connection must not be cached to avoid issues with the stream. It's important to note that we never call the function res.end(). This is because the connection must stay open to allow the server to send data to the client. The function res.end() closes the connection.
Chat Logic
This is very simple and simplified to the maximum, but the logic behind remains the same as a more complex application.
In our server, we will have a logic to receive messages from clients.
// ...

const server = createServer((req, res) => {
// `/events` endpoint used to listen for messages
  if (req.url === '/events') {
    // ...

    // `/messages` endpoint used to post messages
  }
  else if (req.url === '/message') {
    let body = ''

    req.on('data', (chunk) => {
      body += chunk
    })

    req.on('end', () => {
      // TODO: broadcast the message

      // Redirect to the index.html file
      res.statusCode = 302
      res.setHeader('Location', '/')
      res.end()
    })
  }
  else {
    // Serve the index.html file
    // ...
  }
})
When the URL requested is /message, the server will listen for the data sent by the client, which is the body of the request. When the request is finished, the server redirects the client to the index.html file. This is a classic behavior when a form is submitted for a server-rendered application.
In our index.html file, add a form to send messages to the server:
<!doctype html>
<html lang="en">
  <head>
    <meta charset="UTF-8" />
    <meta name="viewport" content="width=device-width, initial-scale=1.0" />
    <title>Node SSE</title>
  </head>
  <body>
    <form action="/message" method="post">
      <input type="text" name="message" />
      <button type="submit">Send</button>
    </form>
  </body>
</html>
Broadcast the Message
The missing feature is the broadcast of the message. How do we broadcast the message and what does it mean?
A broadcast is when a message is sent to everyone. Otherwise, it's a unicast, when a message is sent to a specific person.
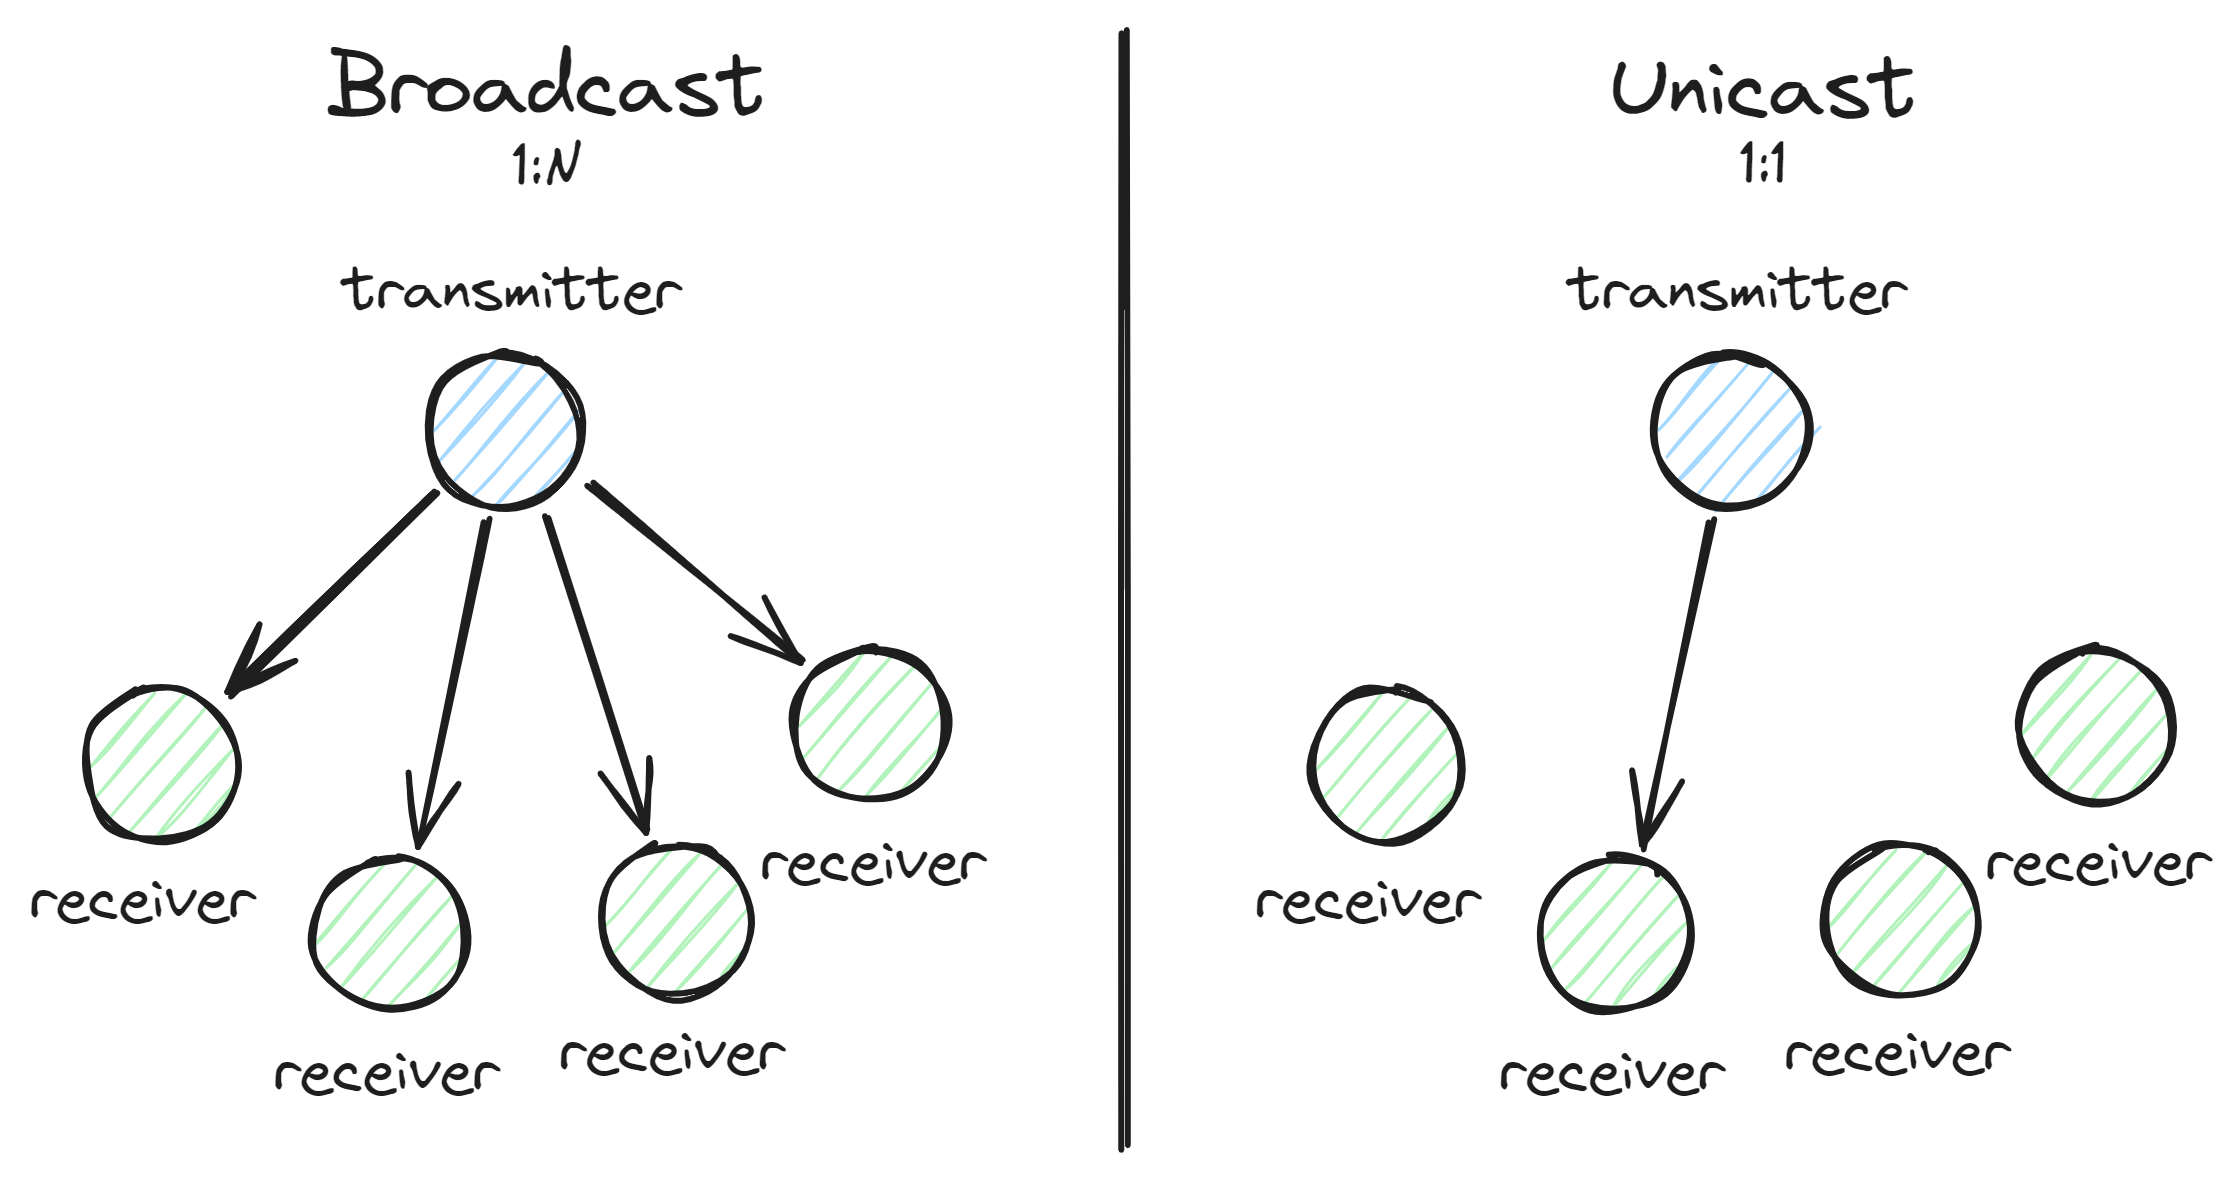
In our case, the client A will send a message to the server (unicast). Then, the server will send this message to every client (broadcast).
The unicast has been implemented in the previous section. For the broadcast, we need to keep track of the connected clients to loop over them when a message is received.
// ...

// Keep track of the connected clients
const connection = new Set()

const server = createServer((req, res) => {
  // `/events` endpoint used to listen for messages
  if (req.url === '/events') {
    res.setHeader('Content-Type', 'text/event-stream')
    res.setHeader('Cache-Control', 'no-cache')

    connection.add(res)

    req.on('close', () => {
      connection.delete(res)
    })

    // `/messages` endpoint used to post messages
  }
  else if (req.url === '/message') {
    let body = ''

    req.on('data', (chunk) => {
      body += chunk
    })

    req.on('end', () => {
      // Broadcast the message to all connected clients
      for (const client of connection)
        client.write(`data: ${body}\n\n`)

      // Redirect to the index.html file
      res.statusCode = 302
      res.setHeader('Location', '/')
      res.end()
    })
  }
  else {
    // Serve the index.html file
    // ...
  }
})

// ...
When a client connects to the /events endpoint, the server adds the response object to the connection set. When the connection is closed, the response object is removed from the set. Easy!
We keep this object to be able to send data to the client using the method write. It's the heart of the system.
When a message is received on the /message endpoint, the server loops over the connection previously saved to send the message to every client.
We can observe the data keyword in the message and the double \n at the end. This is the format of the Server-Sent Events. The data keyword is used to send data to the client, and the double \n is used to tell the client that the message is finished. The client will only expose the content after the data keyword and before the double \n.
For example, if the server sends data: Hello\n\n, the client will see Hello.
EventSource API
Our server handles the connection and broadcasts messages, but the client is still not able to connect to the SSE endpoint, resource /events.
In order to connect to the server, we will use the EventSource API. This API is a native JavaScript API to handle Server-Sent Events, and it's very straightforward.
In the beginning of our file, we need to have a little script to connect and to handle messages:
<!doctype html>
<html lang="en">
  <head>
    <meta charset="UTF-8" />
    <meta name="viewport" content="width=device-width, initial-scale=1.0" />
    <title>Node SSE</title>
    <script>
      // Connect to the server
      const eventSource = new EventSource("/events");

      const ul = document.querySelector("ul");

      // Listen for message
      eventSource.onmessage = (event) => {
        // Add the message to the list
        const li = document.createElement("li");
        li.innerText = event.data;

        ul.appendChild(li);
      };
    </script>
  </head>
  <body>
    <ul></ul>

    <form action="/message" method="post">
      <input type="text" name="message" />
      <button type="submit">Send</button>
    </form>
  </body>
</html>
The script starts by asking for the resource /events from the server using the EventSource API. This will automatically handle the reconnection.
Then, we register a method onmessage that will be triggered every time a message is received by the client from the server.
To have something more like a chat, we will add a list to display the messages. When a message is received, we will create a li element and append it to the list.
Now, we can open two tabs in our browser and send messages. It will appear in the other tab. :magic:
Final Words
Even if this is a very simple example, remember that the logic of storing clients and broadcasting with a loop is the same as a more complex application.
There are two things to remember with Server-Sent Events:
- Use the
EventSourceAPI to connect to the server - Respond with
Content-Type: text/event-streamfrom the server
Nothing more. It's simple, it's HTTP, and it's powerful.
I hope this article will help you to understand how Server-Sent Events work and to give you the confidence to use it in your projects. It's a very powerful tool to build real-time applications without the complexity of WebSockets.

Thanks for reading! My name is Estéban, and I love to write about web development.
I've been coding for several years now, and I'm still learning new things every day. I enjoy sharing my knowledge with others, as I would have appreciated having access to such clear and complete resources when I first started learning programming.
If you have any questions or want to chat, feel free to comment below or reach out to me on Bluesky, X, and LinkedIn.
I hope you enjoyed this article and learned something new. Please consider sharing it with your friends or on social media, and feel free to leave a comment or a reaction below—it would mean a lot to me! If you'd like to support my work, you can sponsor me on GitHub!
Discussions
Add a Comment
You need to be logged in to access this feature.